Documenting processes means writing down the steps your team follows to complete a recurring task, so that anyone can execute it without asking. It sounds simple, but according to a study by APQC, 65% of small and medium-sized businesses don’t have their key processes documented. The result: knowledge trapped in the heads of a few people, onboarding that takes weeks and mistakes that keep repeating.
In this guide we explain how to document business processes in 6 practical steps, with real examples and the mistakes you should avoid.
What is process documentation and why does it matter?
Process documentation is the structured record of activities, decisions and people responsible for a business task. A well-documented process answers three questions: what needs to be done, who does it and what happens when something goes differently than expected.
Companies that document their processes see measurable results:
- Faster onboarding. New team members have a guide from day one instead of weeks of informal explanations.
- Less dependence on key people. If only one person knows how to process an invoice or onboard a client, every holiday or sick leave becomes an operational risk.
- Consistent results. When everyone follows the same steps, quality doesn’t fluctuate depending on who performs the task.
- A foundation for continuous improvement. You can’t optimise something you can’t see. A written process helps you spot bottlenecks, duplicate steps and inefficiencies.
Which processes should you document first?
Don’t try to document your entire company at once. Organisations that attempt this abandon the project within a month. Instead, start with the 3 processes that meet the most of these criteria:
- They happen frequently — weekly or daily.
- They involve multiple people or departments.
- They cause recurring problems when someone is unavailable.
- They are critical for revenue or customers — billing, deliveries, after-sales support.
Practical example: A 15-person marketing agency identified these 3 as priorities: new client onboarding (involves 4 people), campaign review and approval (causes weekly delays) and monthly billing close (only one person knows how to do it).
Step 1: Talk to the people who execute the process
The first step is to sit down with the people who actually do the work, not those who designed or supervise it. The gap between the theoretical process and reality is usually huge.
Spend 15-20 minutes per person and ask these questions:
- What event or action triggers the start of this process?
- What are the steps you follow, in order?
- At which points do you make decisions that change the path?
- What tools, documents or systems do you use?
- What problems or blockers come up most often?
- How do you know the process has been completed correctly?
Don’t worry about formatting at this stage. Take notes and focus on understanding reality, not the idealised version of the process.
Step 2: Structure the process steps
With the information gathered, organise it into a consistent format. Each documented process should include these elements:
| Element | Description | Example |
|---|---|---|
| Name | Clear and descriptive | “New client onboarding” |
| Objective | What it’s for, in one sentence | “Ensure every new client gets access and training within 48h” |
| Owner | Who owns the process | “Customer Success Manager” |
| Steps | Numbered list with action verbs | “1. Receive form. 2. Verify data. 3. Create account…” |
| Decisions | Branches with clear criteria | “Over €5,000? → Yes: requires management approval” |
| Expected result | How to know it was completed correctly | “The client has logged in and completed onboarding” |
Rule of thumb: If a step needs more than two lines of explanation, it’s probably a sub-process that should be documented separately.
Step 3: Create a flowchart
A flowchart is the visual representation of the process. It doesn’t replace the text — it complements it: while the text explains the details, the diagram lets you see the entire process in seconds.
An effective flowchart follows these rules:
- It has a clearly marked start and end.
- It uses nodes for each step and labelled connections to represent decisions and alternative paths.
- It flows in a logical, sequential way, easy to follow from one step to the next.
- It can be understood in less than 30 seconds without needing a legend.
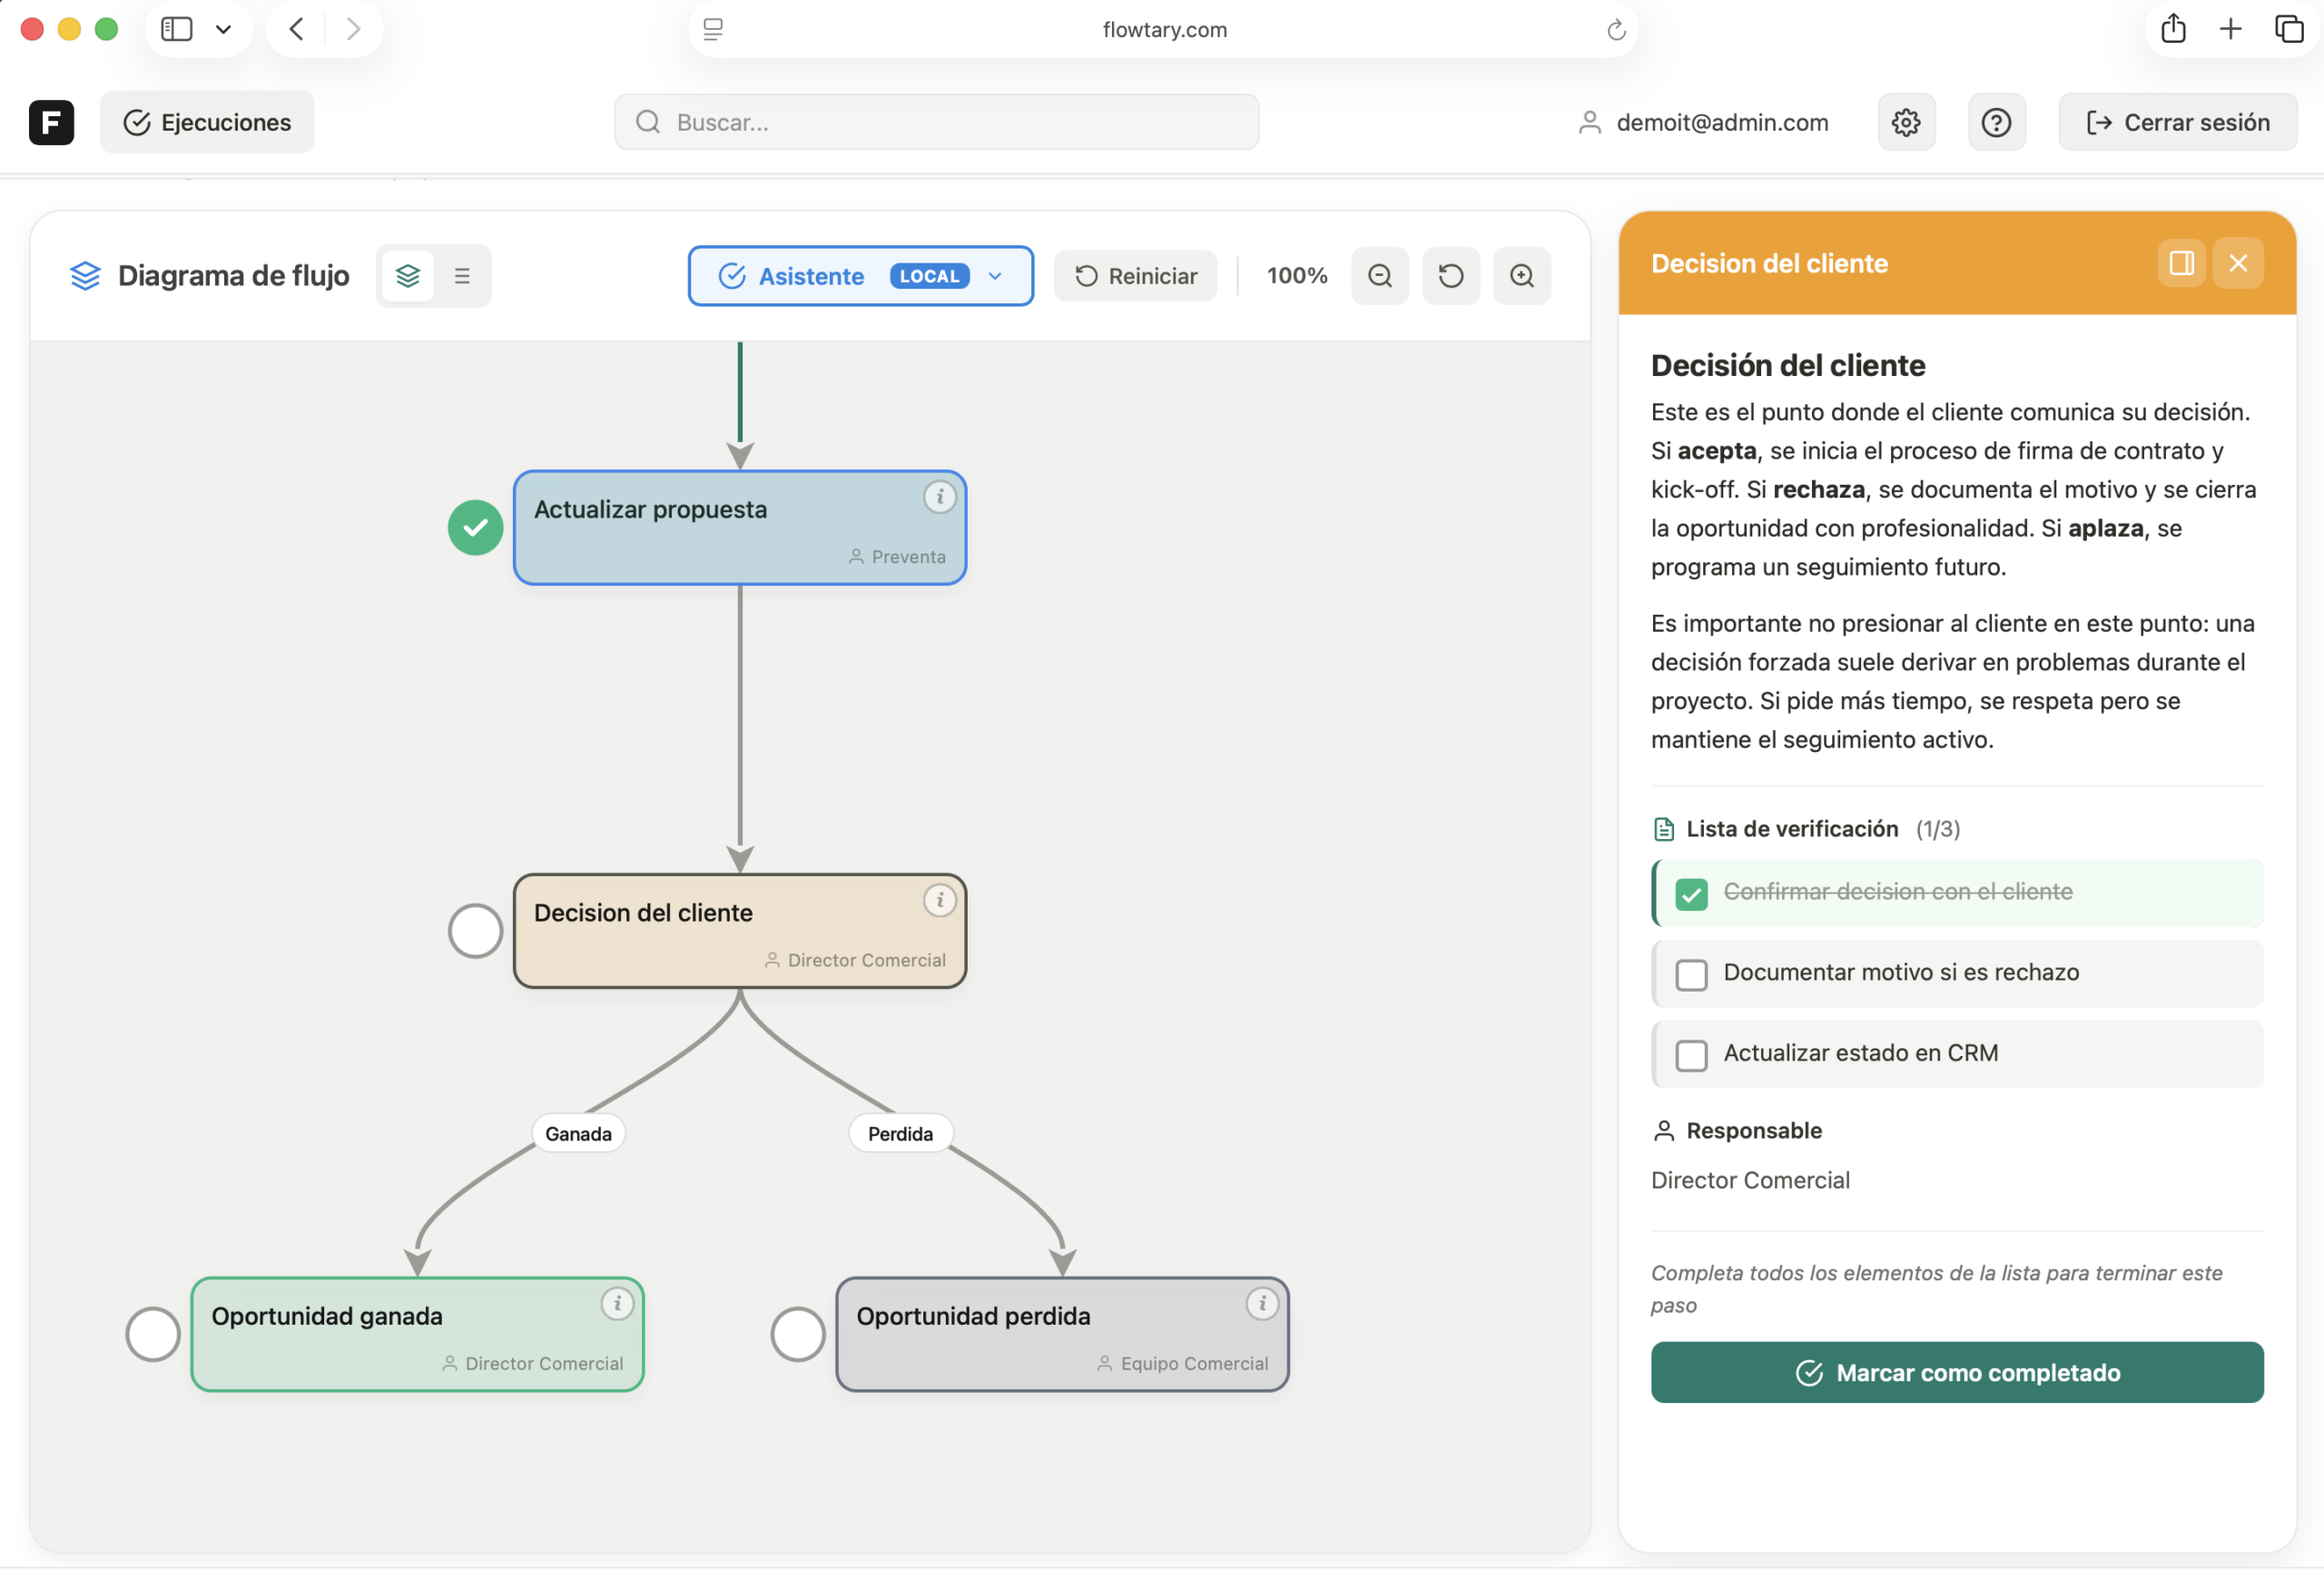
The key is choosing a tool that doesn’t require you to be a designer. Flowtary, for example, lets you create diagrams by dragging nodes onto a visual canvas, connecting them with labelled arrows, and adding to each step a detailed description with rich text, task checklists, file attachments and the assigned owner. Everything is documented in one place, ready for your team to consult or execute step by step.
Step 4: Validate with your team
Before considering the process documented, share it with the people who execute it and ask yourself:
- Is there a step we take for granted that a new employee wouldn’t know?
- Does the order reflect reality or how we think it should be?
- Are there frequent exceptions we haven’t accounted for?
This step is critical. A documented process that doesn’t reflect reality creates false confidence and is worse than having no documentation. Spend 20 minutes reviewing the draft with the team before publishing it.
Step 5: Centralise and organise the documentation
Process documentation is worthless if it lives in a forgotten PDF in a shared folder. For your team to actually use it:
- A single accessible location — Everyone should know where to find processes without asking.
- Organised by area — Group by department or function: Sales, Operations, HR, Finance.
- Proper permissions — The team needs read access; process owners need edit access.
- Quick search — When someone needs a process, they should find it in under 10 seconds.
Tools like Flowtary let you organise processes into folders with role-based permissions, so each person sees only what they need and process owners can edit and keep documentation up to date.
Step 6: Review and update regularly
Processes change. Tools get updated. People rotate. If you don’t review the documentation, it becomes outdated within months.
Set up a review calendar:
- Quarterly: Critical processes (billing, customer support, deliveries).
- Every six months: Support processes (onboarding, procurement, HR).
- After any change: If a tool, a key person or a regulation changes, update the affected process immediately.
Assign a specific owner for each process. Without an owner, nobody updates it.
5 common mistakes when documenting processes
1. Trying to document everything at once
It’s the fastest way to abandon the project. Start with 3 key processes. It’s much better to have 3 well-documented processes than 30 half-done ones.
2. Writing to impress, not to clarify
Use simple language and short sentences. If a new hire can’t understand it on the first read, simplify it. Process documentation is not an academic paper.
3. Not involving the people who execute the process
Documenting processes from an office, without talking to those who actually do the work, produces documentation that doesn’t reflect reality. The people who execute the process daily are your primary source.
4. Document and forget
In our experience, a documented process that isn’t reviewed for 12 months has a 70% chance of containing outdated steps. Documentation is a living product, not a one-time deliverable.
5. Not using visual support
A wall of text is not effective documentation. Flowcharts, decision tables and screenshots make documentation easier to follow and reduce interpretation errors.
How long does it take to document a process?
Less than you think. A medium-complexity process (8-15 steps, 2-3 roles involved) can be documented in approximately 1 hour:
- 15-20 minutes: Interview with the person who executes the process.
- 20-25 minutes: Writing the steps and creating the diagram.
- 15-20 minutes: Validation with the team.
The return on that hour is huge: every time a new person needs to execute that process, instead of 30 minutes of explanations they’ll have a clear guide ready to follow.
Get started today
You don’t need a 6-month project or an external consultancy. Pick a process that causes recurring problems, spend 15 minutes talking to the person who executes it, write down the steps and create a diagram. In one hour you’ll have your first documented process.
Documenting is just the first step. With Flowtary your team can also execute each process with guided assistance and audit who did what and when. Try Flowtary for free or contact us for a free consultation to accelerate your company’s processes.